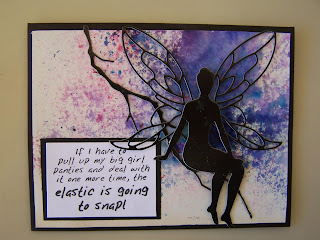
Friday, November 1, 2019

You Are Always In My Thoughts


With the holidays getting closer, more people find themselves needing some cheering up. I wonder if it is because the days are getting shorter, trees are starting to loss their leaves, the year is coming to an end and we are all needing a good rest! But life is getting busier and more hectic with the three major holidays to deal with. Time to get busy and create some cards with uplifting messages….just might send some to myself…smile.


Supplies:

Any of the Arnold Grummer® paper making kits & paper press
Blender, cello sponges and soft towels
A sunny window
Scraps of white paper (think junk mail, etc.) 
Stamps: Quiet Fire Designs™ #6407 “You never know…..” & #6005 “Invisible tears…”
        (LOVE these stamps!!!)
Beacon ZipDryTM adhesive
Double sided foam tape
ColorBox™ Dyestress Blendable inks: #23109 Graphite, #23117 Bumble Bee (grey card),
        @23113 Aster, #2308 Heather, # 23100 Posey, # 23101 Fruit Punch, # #23106 Scuba
        (purple card), Archival ink pad: Wicked Black
Crafters Edge™ Crossover II™ Die cutting & embossing machine (LOVE this machine!!!)
Dies: unknown
Hinged stamp positioner
Purple and grey cardstock cut and folded: 4 ¼ x 5 ½ cards
Scraps of purple and gray cardstock to die cut
Envelopes to fit cards
Craft sheet

Instructions:

1. Follow the instructions found in any of the Arnold Grummer™ paper making kits to create
        white slurry and create one or more sheets of handmade paper.
2. Place the sheets of paper in the paper press to dry. 
3. When the sheets are dry, tear them into approx. 4 x 5 ¼ pieces.
4. When the paper is dry tap some of the Dystress ink pads onto the craft sheet. (Note, see above
        list for which colors to use for each project.)
5. Mist the inks with water.
6. Place the handmade papers onto the misted ink and pick up color.
7. When you are happy with the inked background, allow it to dry.
8. When it is dry, place the torn inked paper into the hinged stamp positioner.
9. Place the stamp face down where you want it on the paper.
10. Close the lid.
11. Open the lid and ink the stamp with Wicked Black Archival ink.
12. Close the lid to stamp the paper.
13. * Repeat steps #8 through #12 until the ink is dark enough.
14. Die cut the shapes.
15. Center and attach the stamped handmade papers to the fronts of the cards with small pieces
        of double sided foam.
16. Attach the die cuts with ZipDry adhesive.
-------------------------------------------------------------------------------------------
TAGS: Arnold Grummer, Michele Emerson-Roberts, handmade paper, QuietFire, Crafters Edge, Beacon, ClearSnap

Friday, October 18, 2019

A Plan for Miricles

“Bright Spots” are what I call small framed sayings. They display just about anywhere, take up hardly any space and brighten everyone’s day. Making them with handmade paper makes them even more special and can be created in a short amount of time.


Supplies:

Any of the Arnold Grummer® paper making kits and paper press
Blender, cello sponges and soft towels
A sunny window
Scraps of white paper (think junk mail, etc.) 
Small frames with glass & black backing to fit the verbiage stamps you want to use
Stamps: Crafter’s Companion™ by Sheena Douglas 
Westcott™ paper trimmer
Hinged stamp positioner
Beacon ZipDryTM adhesive
ColorBox™ Archival ink pad: “Wicked Black, Dystress Blendable ink pads: #23116 Capri,
        #23111 Palomino, # 23108 Heather
Craft sheet or water proof surface
Water mister bottle

Instructions:

1. Follow the instructions found in any of the Arnold Grummer™ paper making kits to 
        create white slurry and create one or more sheets of medium weight handmade paper.
2. Place the sheets of paper into the paper press.  
3. Allow the paper to dry.
4. When the paper is dry tap some of the Dystress ink pads onto the craft sheet.
5. Mist the inks with water.
6. Place the handmade papers onto the misted ink o pick up color.
7. When you are happy with the inked background, allow it to dry.
8. Cut the inked papers the size you need for the verbiage stamp and frame.
9. Place the cut paper into the hinged stamp positioner.
10. Place the stamp face down where you want it on the paper.
11. Close the lid.
12. Open the lid and ink the stamp with Wicked Black Archival ink.
13. Close the lid to stamp the paper.
14. * Repeat steps 12 & 13 until the ink is dark enough.
15. * Repeat steps 9 through 13 for the second saying.
16. Attach the stamped sayings to the black backings and place them into the glassed 
        frames.
17. Place each  on a small easel to display.


-------------------------------------------------------------------------------------------
TAGS: Arnold Grummer, Michele Emerson-Roberts, handmade paper, Westcott, ColorBox, Beacon Adhesive, Crafter’s Companion

Thursday, October 17, 2019

From a Tiny Acorn

I have been picking up and preserving oak leaves for several months. They are wonderful to use for some of the many fall cards that I create and send out. Every leaf is beautiful and enhances both birthday and encouragement cards as well as mixed media and collage pieces of art.


Supplies:

Any of the Arnold Grummer® paper making kits & paper press
Blender, cello sponges and soft towels
A sunny window
Arnold Grummer Flower Press # 395
Oak leaves
Scraps of white and tan paper (think junk mail, etc.)
Dried herbs or spices
Dark brown and peach colored card stock for card bases
Envelopes to fit cards
Stamps:
o Quiet Fire Designs™ #5635 “Anyone……”
o Club ScrapTM Falling Leaves kit “Happy Birthday”
Westcott™ paper trimmer
Scor-Pal™
Hinged stamp positioner
Beacon ZipDryTM adhesive, double
Water proof surface or craft sheet
Water mister bottle
ColorBox™ Dyestess Blendable ink pads: #23108 Salmon, #23114 Mint & #23111 Palomino
                   Archival Ink pad: Mudslide

Instructions:

1. Follow the instructions found in any of the Arnold Grummer™ paper making kits to create
        white slurry and create one or more sheets of handmade paper.
2. Place the paper into the paper press
3. Allow the paper to dry.
4. **Repeat steps 1 thru 3 to create off white paper with some dried spices.
5. When the papers are dry, tear a piece of each approx. 4 x 5 ¼ “.

Peach card:
      1. Tap the three colors of Dystress inks onto the craft sheet.
      2. Mist the inks with water.
      3 Place the torn sheet of white handmade paper onto the misted ink, picking up colors.
      4. Allow the paper to dry.
      5. Place the dry inked paper into the stamp positioner.
      6. Place the “Anyone….” stamp onto the paper where you want the verbiage, close the lid.
      7. Open the lid and ink the stamp with Mudslide, close the lid.
      8. Repeat step 7 until the verbiage is as dark as you want it.
      9. Use ZipDry adhesive to attach the dried Oak leaf to the top left of the inked & stamped paper.
      10. Attach the inked stamped paper to the center of the peach card.

Brown card:
     1. Place the torn off white with spices handmade paper into the stamp positioner.
     2. Place the “Happy Birthday” stamp onto the paper where you want the verbiage, close the lid.
    3. Open the lid and ink the stamp with Mudslide, close the lid.
    4. Repeat step 3 until the verbiage is as dark as you want it.
    5. Use ZipDry adhesive to attach a dried Oak leaf to the bottom right of the handmade paper.
    6. Attach the stamped handmade paper to the front of the brown card.

Add your message inside the cards and send them on their way.

NOTE: I always make extra handmade paper to use for future projects and will often color whole sheets with the inks for future use.


-------------------------------------------------------------------------------------------
TAGS: Arnold Grummer, Michele Emerson-Roberts, handmade paper, dried leaves, QuietFire Designs, Club Scrap, ColorBox, Scor-Pal, Beacon Adhesives, Westcot

Friday, May 3, 2019

Something to Brighten Your Day


Last Friday’s project grew to be 6 books, one of which will be for encouragement cards. With that in mind I checked out my stash of handmade papers which had been previously made more beautiful with the addition on my favorite inks. You may remember that I create these papers in batches and stockpile them for future use.


Supplies:

Any of the Arnold Grummer® paper making kits and paper press
Blender, cello sponges and soft towels
A sunny window
Scraps of white paper (think junk mail, etc.)
Scraps of black card stock to die cut and for layering
Black card stock for the card bases
Scraps of thin white tissue paper to stamp on
MemoryBox Fairy and branch dies
Stamps::
o Visible Image™ VIS-WDT-01 “Where dreams take you” and VIS-NEW-01 “New beginings”
SpellbindersTM Plantinum™ die cutting and embossing machine
Westcott™ paper trimmer
Scor-Pall™
Beacon ZipDryTM adhesive, double sided foam tape
ColorBox™ black pigment ink pad, Dyestress Blendadble Ink pads: #23107 Pansy, # 23101
        Fruit Punch and #23106 Scuba
Tiny clear flat backed crystal
Non stick craft sheet

Instructions:

1. Follow the instructions found in any of the Arnold Grummer™ paper making kits to create
        white slurry and create numerous sheets of light/medium weight handmade paper.  
2. Allow the sheets of paper to dry.
3. When the paper is dry cut or tear it into four pieces 4 x 5 ¼”. Set the rest of the paper aside. 
        You will need two small pieces for layering. 
4. Tap the three pads of Dyestress ink onto the nonstick craft sheet. Mist with water and lay the
        small sheets of handmade paper onto the inks. Rub or pat the paper to pick up the inks. When
        you are happy with the background, set the paper aside to dry. 
5. Die cut the Fairies and branch from scraps of black cardstock.
6. Cut, score and fold the black card stock for create four 4 ¼ x 5 ½” cards.
7. Attach the inked backgrounds onto the folded cards with ZipDry adhesive.
8. Stamp the verbiage “close your eyes” onto tissue paper. When the ink is dry, tear the tissue 
        close to the verbiage and attach the tissue to the right middle of a card with ZipDry adhesive. 
        Attach one small Fairy to the left side of this card with tiny pieces of double sided foam.
9. Stamp “Go where your dreams take you” onto tissue paper. When the ink is dry, tear the 
        tissue close to the verbiage and attach it to the right side of one of the cards with ZipDry 
        adhesive. Attach another small fairy to the left side with tiny pieces of double sided foam tape.
10. Stamp the eye and the verbiage onto tissue paper. When the ink is dry, tear close to the eye and
        verbiage. Attach the eye tissue to the top right of one of the cards. Attach the tiny clear flat 
        backed crystal as a sparkle in the eye. Layer a small piece of background paper onto black
        cardstock. Attack the tissue onto the layerd piece with ZipDry adhesive. Attach the layered 
        piece to the bottom left with double sided foam pieces.
11. Stamp some verbiage onto a small scrap and layer the stamped piece onto a scrap of black
        cardstock. Attach the stamped piece to the lower left of the card with double sided foam pieces.
12. Attach the die cut branch with ZipDry adhesive. Attach the large fairy with double sided foam
        pieces.


-------------------------------------------------------------------------------------------
TAGS: Arnold Grummer, Michele Emerson-Roberts, handmade paper, cards, encouragement, Dyestress Blendable inks, Fairies, Visible Image Stamps


Friday, April 26, 2019

And a Happy New Year

What a perfect way to start the New Year! This loose leaf book will be perfect to hold handmade paper birthday cards for those special people in your life! If you are blessed with a lot of “special” people you may need to make several of these books….smile. Think of the fun ahead  in 2019 of creating the cards to fill the 12 pockets in the book.

Supplies:

Any of the Arnold Grummer® paper making kits
Blender, cello sponges and soft towels
A sunny window
Scraps of white paper (think junk mail, etc.)
6 x 6” pocket calendar book kit
Stamp: Impression ObsessionTM  G20231 “thinking of you with love”
SpellbindersTM Platinum™ die cutting and embossing machine
Large random organic pattern embossing folder
Westcott™ paper trimmer and scissors
Beacon ZipDryTM adhesive
Old credit card to use as an adhesive spreader.
ColorBox™ Dystress Blendable ink pads: # 23110 Cattail, #23102 Salmon and # 23111
        Palomino, Stylus handle and white tips
Small piece of thin white tissue paper to stamp on
Marvy ® Le Plume permanent marker # E866
6” pieces of various kinds, widths and colors of ½ ribbon
Awl

Instructions:

1. Follow the instructions found in any of the Arnold Grummer™ paper making kits to
     create white slurry and cast 3-4 sheets of medium weight paper.
2. Allow the paper to dry.
3. Cut two pieces of handmade paper 8 x 8”
4. Place one sheet of the cut paper into the embossing folder and run it through the Platinum
    machine.
5. *Repeat these step for the second piece of 8 x 8” paper.
6. Use the Stylus to apply tiny amount of the three colors of Dystress™ inks to the two
     pieces of embossed paper. More toward the edges.
7. Allow the inks to dry.
8. Use the Cattail ink to stamp the saying on the white tissue paper.
9. When the ink is dry, outline the words with the Marvy®  marker.
10. Cut two pieces of the handmade paper 5 ½ x 5 ½ inches.
11. Apply ZipDry adhesive to the front cover.
12. Place the cover adhesive side down onto one of the 8 x 8” embossed papers.
13. Miter the corners, wrap to the back of the cover and glue.
14. Apply ZipDry adhesive to the back side of the cover, attach one of the 5 ½ x 5 ½” pieces
      of paper.
15. * Repeat these steps for the back cover.
16. Use the awl to open up the holes on the book covers.
17. Tear the edges of the stamped tissue paper close to the saying.
18. Apply ZipDry adhesive to the back of the tissue and attach the tissue to the center of
      the front cover.
19. Insert the rings into the covers, dividers and pocket pages.
20. Tie “lots” of 6” pieces of ribbon to the rings.
21. Fill the pockets with cards made with handmade paper.


-------------------------------------------------------------------------------------------
TAGS: Arnold Grummer, Michele Emerson-Roberts, handmade paper, calendar, cards, Beacon Adhesive, Marvy®, ColorBox® Dystress Blendable inks, Spellbinders

Saturday, January 5, 2019

And There's More

I always need more encouragement cards then I have on hand and liked the “Quotes” cards so much that I created several more sheets of similar color palette handmade paper backgrounds. Paired with 4 different stamps from Impression Obsession, a great die from Joy and some green card stock I now have some beautiful cards to have on hand when needed.


Supplies:

Any of the Arnold Grummer® paper making kits
Blender, strainer, cello sponges and soft towels
A sunny window
Scraps of white paper (think junk mail, etc.)
Impression Obsession stamps: D14603 “This….”, D14742 “…. Beginning…..”,
        D14592 “Too Often”,  D9990 “Sometimes”
Tonic Studios™ paper trimmer and tangerine die cut machine
DIES: Joy #60020958 “Circle with Leaves”, Spellbinders small circle set
Embossing folder: Crafters’ Companion “Organic Veined Leaf background”
Two each of different green cardstock: cut and folded to make 6 x 6” cards
Scraps of Kraft colored cardstock (I used the back of a cereal box)
Scor-Pal™
Beacon ZipDryTM adhesive
ColorBox™ Dystress Blendable Ink pads: Cattail, Palomino, Citronella, Shamrock 
        & Salmon, Black Pigment ink pad for stamping verbiage
Small spray/mister bottle and water
Waterproof surface to work on

Instructions:

1. Follow the instructions found in any of the Arnold Grummer™ paper making kits to 
        create white slurry and create one or more sheets of handmade paper. 
2. Allow the paper to dry.
3. Die cut some 3” circles from the handmade paper.
4. Tap the ink pads onto the waterproof surface, overlap some of the colors (I overlapped 
        Citronella and Shamrock to get a more olive green) Vary the amount of ink (I used a bit 
        more of Salmon on some of the pieces.)
5. Mist with water.
6. Lightly tap the handmade paper 3” circles into the inks.
7. Set aside to dry
8. Stamp the verbiage with black pigment ink.
9. Die cut 4 of the Joy circle with leaves 
10. Cut, score and fold the 4 cards.
11. Emboss just the front of the cards with the veined leaf background folder.
12. Attach each of the stamped circles to the center of the card fronts with ZipDry™ 
        adhesive.
13. Check for placement (I had to remove and reattach the inside leaves so they would 
        not cover any of the words.
14. Attach the die cut Joy circle with leaves around the stamped circle.
15. Add a personalized message inside the cards before mailing.

-------------------------------------------------------------------------------------------
TAGS:  Michele Emerson-Roberts, handmade paper, cards, quotes, Dystress inks, Impression Obsession stamps, Arnold Grummer

Quotes

I love sayings and quotes. I collect them by the thousands! When I saw these two stamps from Visible Image I knew that some of the handmade paper created several months ago would be perfect as the background for them. I have two friends who have been going through some rough times and these cards will be a reminder that they are in my thoughts and prayers.


 Supplies:
 • Any of the Arnold Grummer® paper making kits
 • Blender, cello sponges and soft towels
 • A sunny window • Scraps of white paper (think junk mail, etc.)
 • Visible Image stamps: “Scars” & “Invisible Cape”
 • Tonic Studios™ paper trimmer
 • Spellbinders Platinum Die cut and embossing machine and small feather die
 • Black cardstock: 4 ¼ x 5 ½” folded and small scrap to die cut
 • Various colored papers for layering
 • Scor-Pal™
 • Beacon ZipDryTM adhesive
 • ColorBox™ Dystress Blendable Ink pads: Cattail, Palomino, Citronella, Shamrock &
   Salmon, Black Pigment ink pad for stamping verbiage
 • Small spray/mister bottle and water
 • Waterproof surface to work on
 • Various fibers to match the background colors

 Instructions:
 1. Follow the instructions found in any of the Arnold Grummer™ paper making kits to create
     white slurry and create one or more sheets of handmade paper.
 2. Allow the paper to dry.
 3. Cut or tear the sheet of handmade paper into quarters.
 4. Tap the ink pads onto the waterproof surface, overlap some of the colors (I overlapped
     Citronella and Shamrock to get a more olive green) Vary the amount of ink (I used just a
     tiny bit of Salmon.)
 5. Mist the inked paper with water.
 6. Lightly tap the handmade paper into the inks.
 7. Set the inked paper aside to dry
 8. Stamp the verbiage with black pigment ink.
 9. Die cut the feather
10. Trim the layering papers for the “cape” card leaving 1/8” border per paper.
11. Wrap the handmade paper layers with fibers.
12. Layer and attach to the front of the card with ZipDry™ adhesive.
13. Attach the feather die cut to the “scars” card.

 -------------------------------------------------------------------------------------------
 TAGS:  Michele Emerson-Roberts, handmade paper, cards, quotes, Dystress inks, Arnold Grummer,

Friday, January 4, 2019

And a Happy New Year

What a perfect way to start the New Year! This loose leaf book will be perfect to hold handmade paper birthday cards for those special people in your life! If you are blessed with a lot of “special” people you may need to make several of these books….smile. Think of the fun ahead  in 2019 of creating the cards to fill the 12 pockets in the book.


Supplies:


Any of the Arnold Grummer® paper making kits 
Blender, cello sponges and soft towels
A sunny window
Scraps of white paper (think junk mail, etc.) 
6 x 6” pocket calendar book kit
Stamp: 
o Impression ObsessionTM  G20231 “thinking of you with love”
SpellbindersTM Platinum™ die cutting and embossing machine
Large random organic pattern embossing folder
Westcott™ paper trimmer and scissors
Beacon ZipDryTM adhesive
Old credit card to use as an adhesive spreader.
ColorBox™ Dystress Blendable ink pads: Cattail, Salmon and Palomino, Stylus handle and white tips
Small piece of thin white tissue paper to stamp on
Marvy ® Le Plume permanent marker # E866
6” pieces of various kinds, widths and colors of ½ ribbon 
Awl

Instructions:

1. Follow the instructions found in any of the Arnold Grummer™ paper making kits to create white slurry and cast 3-4 sheets of medium weight paper.  
2. Allow the paper to dry.
3. Cut two pieces of handmade paper 8 x 8”
4. Place one sheet of the cut paper into the embossing folder and run it through the Platinum machine.
5. *Repeat these step for the second piece of 8 x 8” paper. 
6. Use the Stylus to apply tiny amount of the three colors of Dystress™ inks to the two pieces of embossed paper. More toward the edges.
7. Allow the inks to dry.
8. Use the Cattail ink to stamp the saying on the white tissue paper.
9. When the ink is dry, outline the words with the Marvy®  marker.
10. Cut two pieces of the handmade paper 5 ½ x 5 ½ inches. 
11. Apply ZipDry adhesive to the front cover. 
12. Place the cover adhesive side down onto one of the 8 x 8” embossed papers. 
13. Miter the corners, wrap to the back of the cover and glue. 
14. Apply ZipDry adhesive to the back side of the cover, attach one of the 5 ½ x 5 ½” pieces of paper.
15. * Repeat these steps for the back cover.
16. Use the awl to open up the holes on the book covers.
17. Tear the edges of the stamped tissue paper close to the saying.
18. Apply ZipDry adhesive to the back of the tissue and attach the tissue to the center of the front cover.
19. Insert the rings into the covers, deviders and pocket pages.
20. Tie “lots” of 6” pieces of ribbon to the rings.
21. Fill the pockets with cards made with handmade paper.


-------------------------------------------------------------------------------------------

TAGS: Michele Emerson-Roberts, handmade paper, calendar, cards, Beacon Adhesive, Marvy®, ColorBox® Dystress Blendable inks, Spellbinders Platinum , Arnold Grummer