© Michele Emerson-Robert
2016
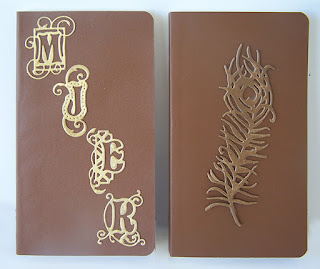
These purchased small
blank journals are perfect for just about everyone on your gift list. The
journals are small and fit into a purse or jacket pocket. They are easy to
customize either with the recipients initials or different themes. My “guys”
(husband, step son, son-in-law and grandson) are all turkey hunters and
fishermen, so I had fun creating the journals for them to keep track of where
and when they saw turkey tracks or when the “big” fish got away. I also like to
add a small calendar inside the front cover.
Remembering Arnolds “Rs” - I will be using cereal box type chip board
for all of the die cuts.
I’ll be back to making
or casting paper next week…..smile.
Supplies
· 3 ¾ x 6 ¾” brown
journals
· Dies: CheeryLynn™ #B599 Tom the Turkey, #B245 “Dream
Big”, #B645 Fishing set, #B439 Old Barn Board/Gone Fishin’, and #B245
"Dream Big"
Instructions:
1. Follow
the instructions found in any of the Arnold Grummer™ paper making kits to
create off-white slurry and create several sheets of medium weight handmade
paper.
2. Repeat
this step creating light weight cream colored handmade paper.
3. Repeat
the process creating medium weight light green paper.
4. Allow
the sheets of papers to dry.
5. Iron
to make them smooth.
6. Cut
the off-white background paper 4 ½ x 6”.
7. Mist
the background piece with water and apply the blue, peach and green inks to the
damp paper, creating a soft colored background.
8. When
the paper is dry, stamp “The moment you accept yourself is the moment you
become beautiful” on the left side of the background paper.
9. Die
cut one fairy from the scrap of off white cardstock.
10. Die
cut lots of leaves from the light green paper.
11. Die
cut lots of bitty blossoms from the cream handmade paper.
12. Follow
the instructions to create the roses.
13. Attach
the background paper to the card front (slightly to the left.)
14. Attach
the elegant fairy to the lower right of the background with tiny pieces of foam
tape.
15. Attach
the leaves and roses to the top and right side of the card above the fairy.


No comments:
Post a Comment