Friday, October 28, 2016

Beautiful Fairy

© Michele Emerson-Robert 2016


Roses and fairies are two of my favorite things, so combining them on this card was easy to do. This card will be for a niece who is having some “issues” about her looks; she is the “cute” one and thinks her older sister is the “beautiful” one. Perhaps the verbiage will hit home for her.


Supplies:

·       Any of the Arnold Grummer® paper making kits
·       Blender,  cello sponges and soft towels
·       A sunny window
·       Scraps of off white, cream and light green paper (think junk mail, etc.)
·       Scrap of  off white card stock to die cut the fairy
·       The PaperCut™ cardstock for card base
·       Dies: Couture Creations™ Secret Garden collection Intricutz #C0724281 Elegant Fairy, SpellbindersTM  S5-086 Bitty Blossoms, and CheeryLynnTM B176 Flourish Leaf strp
·       SpellbindersTM Grand Calibur™ die cutting and embossing machine
·       Westcott™ paper trimmer
·       Scor-Pal™
·       Beacon ZipDryTM adhesive, double sided foam tap
·       ColorBox™ die ink pads in blue, peach, light green, medium blue
·       Stamp: Impression ObsessionTM F17060 “Become”
·       Fine mist bottle, water
·       Iron to make the paper smooth


Instructions:

1.     Follow the instructions found in any of the Arnold Grummer™ paper making kits to create off-white slurry and create several sheets of medium weight handmade paper.
2.     Repeat this step creating light weight cream colored handmade paper.
3.     Repeat the process creating medium weight light green paper. 
4.     Allow the sheets of papers to dry.
5.     Iron to make them smooth.
6.     Cut the off-white background paper 4 ½ x 6”.
7.     Mist the background piece with water and apply the blue, peach and green inks to the damp paper, creating a soft colored background.
8.     When the paper is dry, stamp “The moment you accept yourself is the moment you become beautiful” on the left side of the background paper.
9.     Die cut one fairy from the scrap of off-white cardstock.
10.  Die cut lots of leaves from the light green paper.
11.  Die cut lots of bitty blossoms from the cream handmade paper.
12.  Follow the instructions to create the roses.
13.  Attach the background paper to the card front (slightly to the left.)
14.  Attach the elegant fairy to the lower right of the background with tiny pieces of foam tape.
15.  Attach the leaves and roses to the top and right side of the card above the fairy.
16.  Mail in a small box or padded envelope.

Friday, October 21, 2016

Gift Journals

© Michele Emerson-Robert 2016


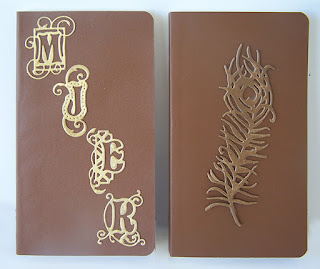
These purchased small blank journals are perfect for just about everyone on your gift list. The journals are small and fit into a purse or jacket pocket. They are easy to customize either with the recipients initials or different themes. My “guys” (husband, step son, son-in-law and grandson) are all turkey hunters and fishermen, so I had fun creating the journals for them to keep track of where and when they saw turkey tracks or when the “big” fish got away. I also like to add a small calendar inside the front cover.  Remembering Arnolds “Rs” - I will be using cereal box type chip board for all of the die cuts. 

I’ll be back to making or casting paper next week…..smile.

Supplies

·       3 ¾ x 6 ¾” brown journals
·       Scraps of tan chip board (I used cereal boxes) to die cut
·       Dies: CheeryLynn™ #B599 Tom the Turkey, #B245 “Dream Big”, #B645 Fishing set, #B439 Old Barn Board/Gone Fishin’, and #B245 "Dream Big"
·       Beacon ZipDryTM adhesive
·       ColorBox™ water bases ink pads, brown & olive green tones, Stylus™ handle & tip
·       Tonic StudiosTM    #804N Mother of Pearl Nuvo Mousse

Instructions:

1.     Follow the instructions found in any of the Arnold Grummer™ paper making kits to create off-white slurry and create several sheets of medium weight handmade paper.
2.     Repeat this step creating light weight cream colored handmade paper.
3.     Repeat the process creating medium weight light green paper. 
4.     Allow the sheets of papers to dry.
5.     Iron to make them smooth.
6.     Cut the off-white background paper 4 ½ x 6”.
7.     Mist the background piece with water and apply the blue, peach and green inks to the damp paper, creating a soft colored background.
8.     When the paper is dry, stamp “The moment you accept yourself is the moment you become beautiful” on the left side of the background paper.
9.     Die cut one fairy from the scrap of off white cardstock.
10.  Die cut lots of leaves from the light green paper.
11.  Die cut lots of bitty blossoms from the cream handmade paper.
12.  Follow the instructions to create the roses.
13.  Attach the background paper to the card front (slightly to the left.)
14.  Attach the elegant fairy to the lower right of the background with tiny pieces of foam tape.
15.  Attach the leaves and roses to the top and right side of the card above the fairy.
Mail in a small box or padded envelope.


Friday, October 14, 2016

Autumn Blues

© Michele Emerson-Robert 2016


Each day the temperature gets a tiny bit lower. You can tell that the beginning of fall is just around the corner. Several close friends have birthdays this month and I wanted to make special cards for them. I have always done “fall” colors in creating their cards and wanted to do something different this year but still honor the fall season.

Supplies
·       Any of the Arnold Grummer® paper making kits
·       Blender, cello sponges and soft towels
·       A sunny window
·       Scraps of white paper (think junk mail, etc.) ™
·       Scrap of white card stock to die cut
·       Scrap of thin plastic to die cut a leaf stencil
·       Scrap of matboard to die cut the leaf shape
·       The PaperCut™ card bases, envelopes
·       Dies: Quiet Fire Designs™ ECD#1158 “Dream”, and Sizzix™ Tim Holtz #660039 Layered Leaf and matching embossing folder
·       SpellbindersTM WIZARD™ die cutting and embossing machine (still the best machine to cut and emboss matboard!!!!)
·       Westcott™ paper trimmer
·       Scor-Pal™
·       Beacon ZipDryTM adhesive, double sided foam tape
·       Ken Oliver Color Burst™ paints
·       Fine mister bottle and water
·       White embossing paste (or light weight spackle)
·       Tonic Studios™ Mother of Pearl Nuvo Mousse™ #804N
·       ColorBox™ Stylus™ handle and white tips
·       Hand cut “Arabesque” stencil
·       Random pattern 5 x 7” embossing folder


Instructions:

1.     Follow the instructions found in any of the Arnold Grummer™ paper making kits to create white slurry, and make one or more sheets of medium weight handmade paper. (I always make extra sheets!) 
2.     Allow the paper to dry.
3.     Cut one piece for each card 3 ¾ x 5 ¾”. (Always save the left over pieces for future projects.)
4.     Water down tiny amounts of the Color Burst™ paints, blues, turquoise, greens, purple (you want very light colors).
5.     Use the Stylus™ handle and tip to apply colors around the edge of each cut sheet of handmade paper. Add a tiny bit of color to the center of one sheet. Mist the paper if needed.
6.     Allow the paper to dry.
7.     Die cut the word “Dream” from the scrap of white cardstock.
8.     Die cut the leaf stencil from the scrap of plastic.
9.     Die cut the leaf from the scrap of matboard.
10.  Apply more intense colors to the matboard leaf die cut.
11.  Allow the matboard leaf to dry.
12.  Emboss the matboard leaf with the embossing folder.
13.  Apply the Mother of Pearl Nuvo Mousse to the edges and veins of the matboard leaf.
14.  Lay the plastic stencil onto the sheet with no color in the center. Apply the watered down CB paints through the leaf stencil with the Stylus handle and tips.
15.  Apply tiny bits of matching CB colors to the die cut word.
16.  Allow the paper and die cut word to dry.
17.  Apply embossing paste (light weight spackle) through the “arabesque” stencil several places on the paper with some color in the center.
18.  Allow the paste to dry.
19.  Score cut and fold the colored cardstock to create 5 x 7” cards.
20.  Emboss the random design onto the card fronts.
21.  Center and attach the background papers to the front of the cards.
22.  Attach the leaf die cut to the middle of the card with tiny pieces of foam tape.
23.  Use adhesive to attach the word “Dream” to the lower portion of the water colored leaf card.


Friday, October 7, 2016

The Bucks Stop Here

© Michele Emerson-Robert 2016


Pretty “girlie” type cards are so easy to create, but I am often challenged to come up with cards for the men in my life. These two cards came together so easily and were quick to complete. I was able to create 6 of each card in about an hour (not counting creating the handmade paper).


Supplies

·       Any of the Arnold Grummer® paper making kits
·       Blender, cello sponges and soft towels
·       A sunny window
·       Scraps of white and tan paper (think junk mail, etc.)
·       The PaperCut™ #709 Kraft card stock (cards are 5 x 7”)
·       Envelopes for cards
·       SpellbindersTM Grand Calibur™ die cutting and embossing machine
·       Westcott™ paper trimmer
·       Scor-Pal™
·       Beacon ZipDryTM adhesive, double sided foam tape
·       ColorBox™ dye based ink pads in light greys and tans, Stylus™ handle and white tips
·       Iron to make the paper smooth
·       Stencils:  The Crafters Workshop™ TCW 208s “Branches”, Crafter’s Companion™ SD-STEN-ITP “Trees”, Plaid Folk Art™ #30989 “Bucks”
·       Stamps: Impression ObsessionTM D17093 “Second….”, Crafter’s Companion™ SD-HSN-“Flight”-EZ
·       Iron (to make the paper smooth)
·       Fine mist spray bottle and water


Instructions:

1.     Follow the instructions found in any of the Arnold Grummer™ paper making kits to create white slurry and create medium weight handmade paper. 
2.     Allow the paper to dry.
3.     Iron the paper to make it smooth.
4.     Cut the handmade paper smaller than the card.  Save the scraps.
5.     Drop some watered down inks onto the paper. Mist with a tiny bit of water if needed.
6.     Allow the ink to dry.
7.     Use the Stylus™ to apply inks through the tree stencils.
8.     When the ink is dry, use darker shades of tan to stencil the deer over the trees.
9.     Allow the inks to dry.
10.  Stamp the two sayings onto scraps of handmade paper.
11.  Layer the stamped pieces onto scraps of Kraft colored card stock.
12.  Score and fold the Kraft cardstock to create 5 x 7” cards.
13.  Center and attach the stenciled pieces to the front of the cards.
14.  Attach the stamped and layered pieces to the bottom areas of the cards.